
How to Ban a malicious IP in Azuracast?
There are times when checking your listeners, (in Reports tab >> Listeners) you might encounter unwanted IPs. Mostly these IPs have an “EMPTY” user agent. They have a longer listening Time (sec). So you might ask yourself, “how can I ban these IPs?”
In Azuracast, banning an IP works the same way, with other radio hosting platforms. For the regular user, you can use the Azuracast UI to ban the IP on your streaming media server. And here’s how to do it:
For SHOUTCAST
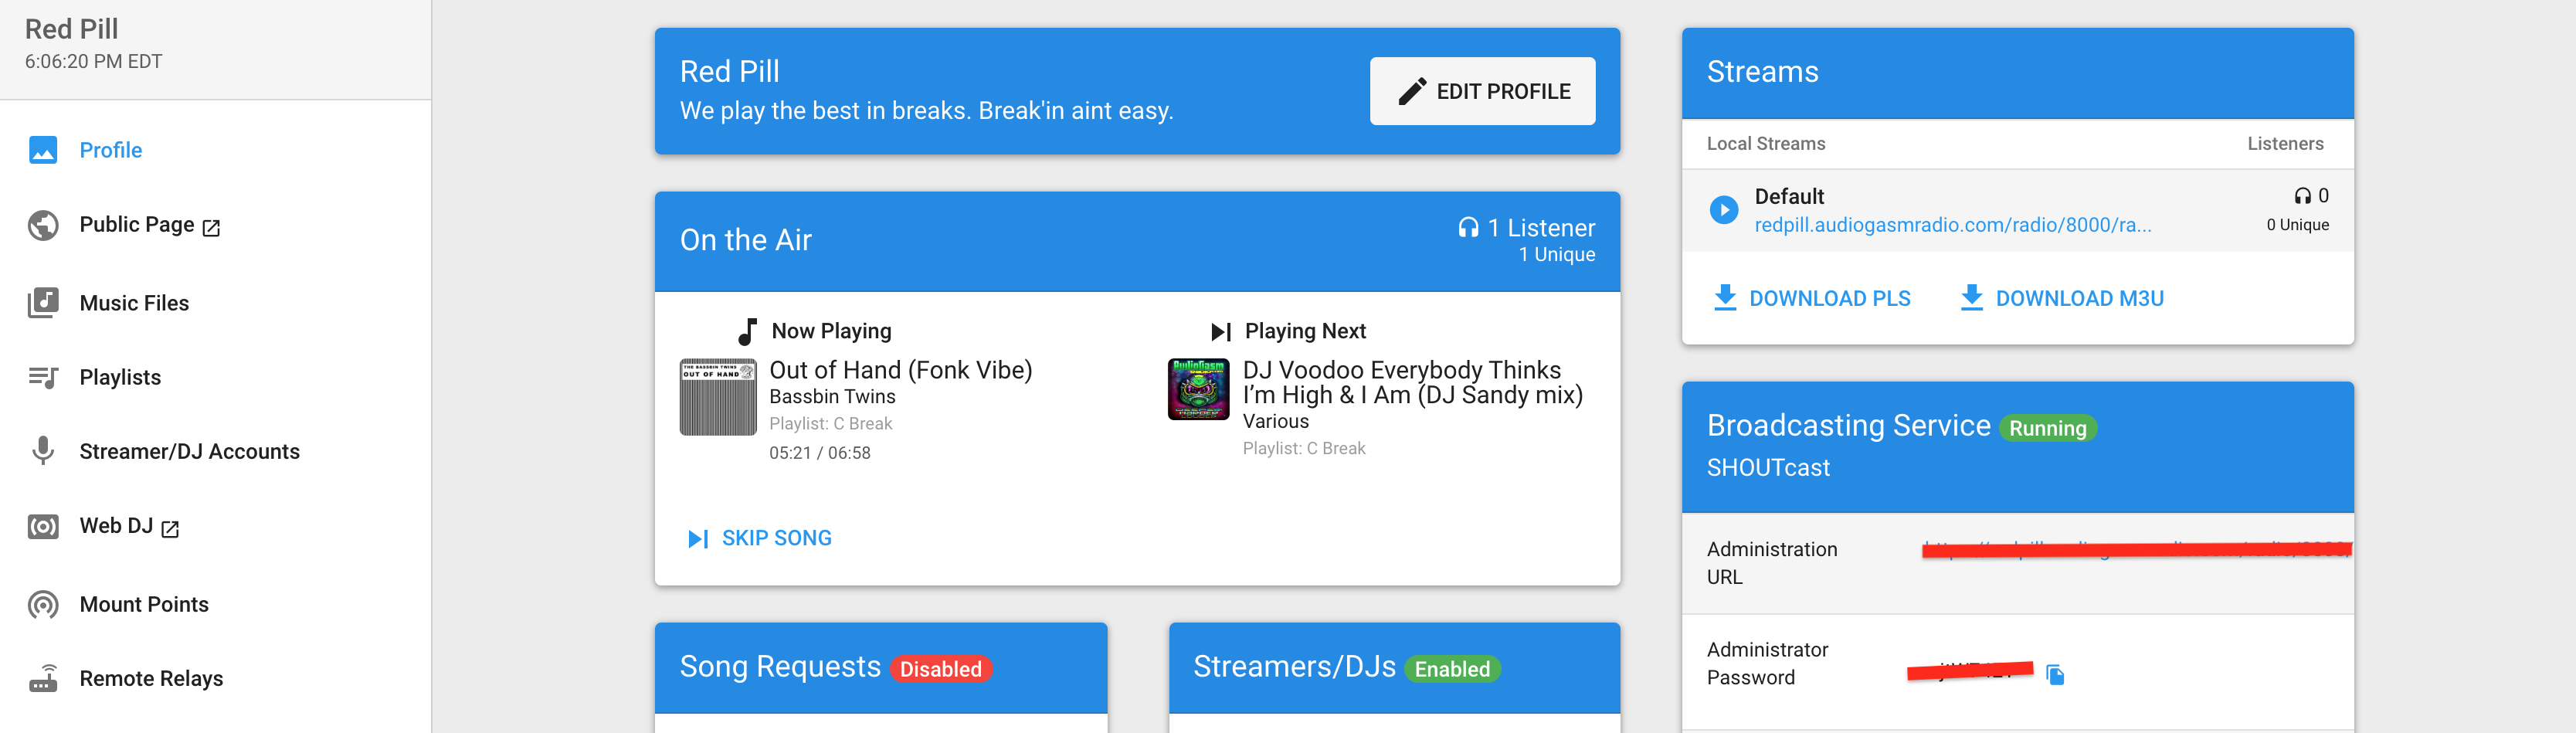
Click Profile tab >> click Administration URL under Broadcasting Service section >> enter the username and password. Take note that the default user will always be “admin”. Still, on the Broadcasting Service section, copy and enter the “Administration password”.
Once you are inside the SHOUTcast panel, do this in the following order:
- Click Ban list
- Enter the IP address to ban
- Click Ban single IP or Ban whole subnet for multiple range
- Check to review if the IP is on the list. You can also click remove to unban it.
Check the image below for visualization.

For ICECAST
There’s no easy way to ban an IP on your ICEcast streaming server. As the admin settings have no interface to ban an IP add. You should be at least an advanced user and confident with terminal (SSH) commands.
To make the banning of an IP possible, you have to edit your nginx.config file.
Take note that Azuracast is hosted on a Nginx server and not Apache. This means that banning an IP using .htaccess is not possible.
A tutorial has been documented in Github on how to do it the hard way. You might want to check it out.