
How to add a custom WooCommerce login button?
In your child theme’s functions.php, add this PHP code.
You can also check the code snippet at Github.
[css]add_filter( ‘wp_nav_menu_items’, ‘custom_login_dashboard’, 10, 2 );
function custom_login_dashboard( $items, $args ) {
if (is_user_logged_in() && $args->primary-menu == ‘primary’) { //change your theme registered menu name to suit – currently for DIVI theme
$items .= ‘<li><a class="mydashboard" href="’. get_permalink( wc_get_page_id( ‘myaccount’ ) ) .’">My Dashboard</a></li>’ . ‘<style> #top-header { background: #7a0101!important;} #main-header, #main-footer, #footer-bottom { background: black!important;}</style>’;
//the style is changing the theme’s color once you are logged in
}
elseif (!is_user_logged_in() && $args->primary-menu == ‘primary’) {//change your theme registered menu name to suit
$items .= ‘<li><a class="mydashboard" href="’ . get_permalink( wc_get_page_id( ‘myaccount’ ) ) . ‘">Log In</a></li>’;
}
return $items;
}[/css]
This PHP code will add the following:
- A login button
- A dashboard (My Account) button, visible only when logged in
- An optional custom header and footer color theme visible for logged in users only.
- If you don’t need it, just remove the <style> tag and its content.
* Both conditions are given a class name. You can change the name to whatever you like.
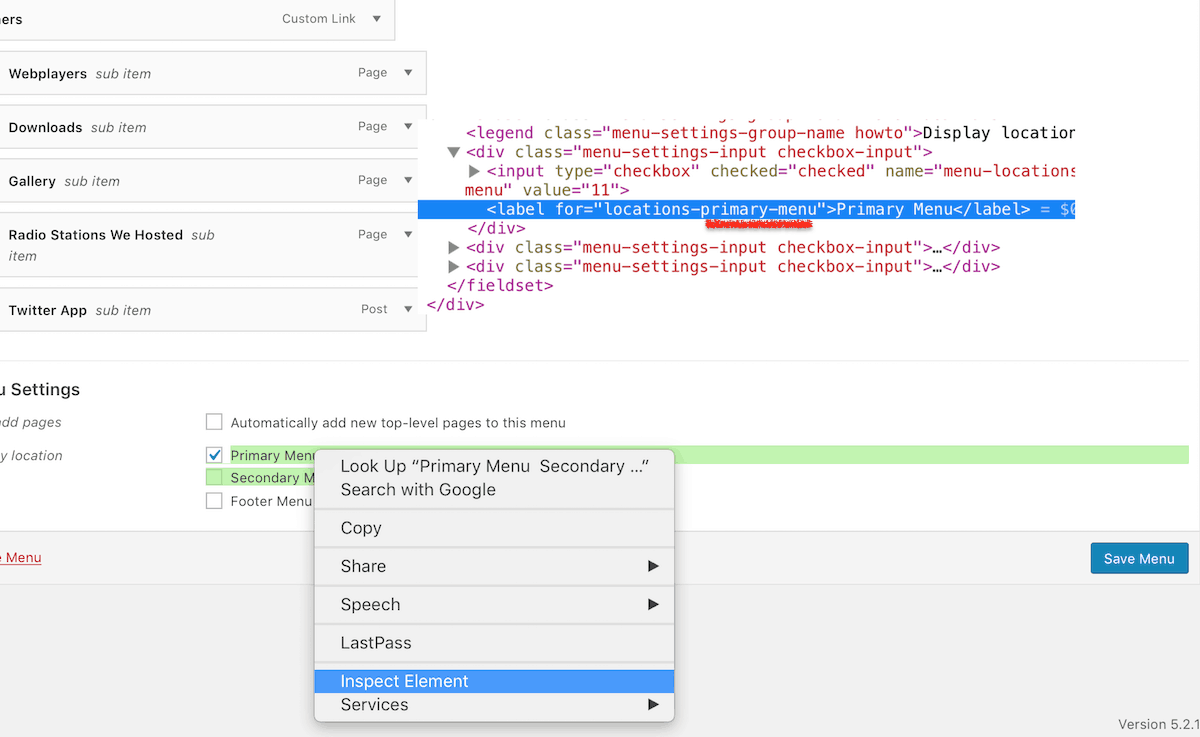
* “primary-menu” is dynamic, it depends on your theme’s registered menu name. In this example, it’s from a DIVI theme.
-
- To check the registered menu name, Go to WordPress dashboard >> Menu >> right click the menus (see example image) then click Inspect Element.
[css]#et-top-navigation .mydashboard {
display: none;
}
[/css]
Add this code to Appearance >> Customize >> Additional CSS. Or if you are using DIVI theme, you can add it in DIVI >> Theme options >> scroll down to the bottom and paste it in Custom CSS. It works exactly the same. So where ever you added it, it doesn’t matter.
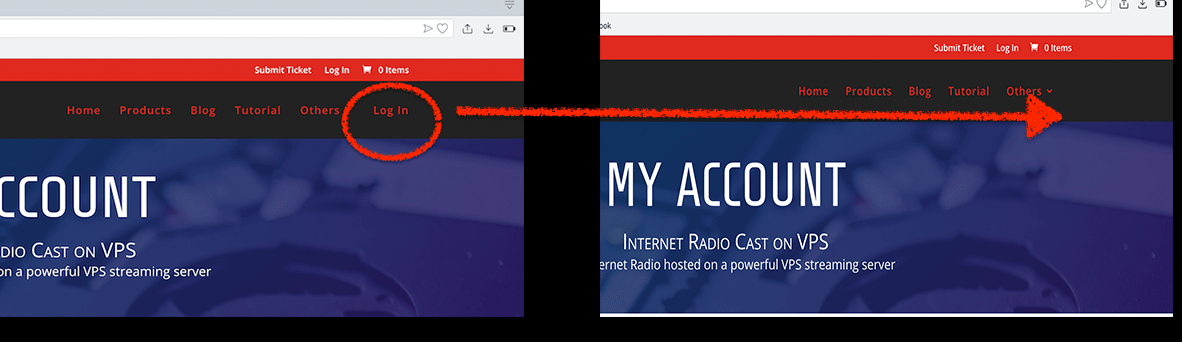
Since I toggled the classes already in the PHP, all we have to do is to add properties. In my example above, I just want my login button on my secondary menu. So I must remove the buttons in the primary menu. (see image below)
To remove the primary header display, Inspect the header’s element first. In DIVI, it’s an id, #et-top-navigation. Thus having an ID then the custom class {code block} in the CSS code.
* Note: In the image, you can also notice that the color theme is darker when user is logged in. This is where the PHP style code takes effect.
Javascript alternative for Css
[css]var altMenu = document.querySelector('#et-top-navigation .mydashboard')
altMenu.style.display = "none";[/css]
To add the JS… either use a plugin, I recommend Insert Headers and Footers. Then paste the code wrap in <script> tag in the footer area.
* Note: If you insist in adding it in the header area, make sure you add async or defer in the end of the script tag.
Otherwise, you can simple add this in DIVI >> Theme options >> Integration. Paste it in the body or bottom post.
* Note: make sure that code integration is enabled.
Finally, add the logout button!
You can use WooCommerce endpoints to simply add a logout button.
To create one, go to Appearance >> Menu. Since I want my login button in the secondary menu, I should select the Custom menu I activated as my secondary menu.
So in the left sidebar of Menu >> scroll down to the options and click WooCommerce endpoints >> tick Logout checkbox then >> click Add button >> finally, hit Save.
Notice in the image above, that the logout button is visible and the nav colors are darker only when the user is logged in. I hope you learn a lot on today’s article.